This server will serve as a platform on which we will directly install the VMWARE VSPHERE operating system version 7.03, and later install the virtual servers in the domain on it, upon the VMWARE SPHERE platform.
1. Preparing the Installation USB
First, you need to prepare the USB drive that will be used to install the OS on the server.
Go to broadcom.com and log in to your personal account (if you don't have an account, create one).
Download the appropriate ISO file. Make sure to verify the exact VSPHERE version needed (7.0.3 includes multiple sub-versions, so find the specific build number required). You can log into the web interface of an existing ESXi server in the domain, check the version section, and note the current version in use.
Steps
- Once you've found the correct ISO version, log in and click your username in the top-right corner of the site.
- Navigate to: All Products → Enterprise Software. Locate the ISO file and download it.
- Create the bootable USB:
- Insert a USB with at least 500MB free space (1GB recommended).
- Use Rufus or a similar tool to burn the ISO onto the USB.
- Select the ISO, ensure the file system is set to FAT, and proceed.
2. Connecting the Hardware
Once the USB is ready, connect it to the server along with the necessary peripherals: monitor, LAN cable (connected to the domain network), keyboard, mouse, and power cable. Power on the server using the front button.
3. Required BIOS Configuration Before ESXi Installation
Before we use the USB to install the ESXi OS, we must configure a few settings in the server's BIOS. Enter BIOS (displayed as 'System Setup') by pressing the BIOS key during startup.
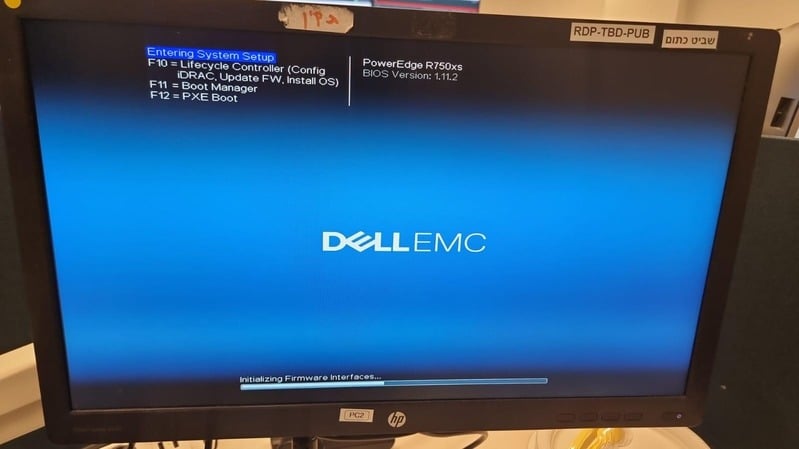
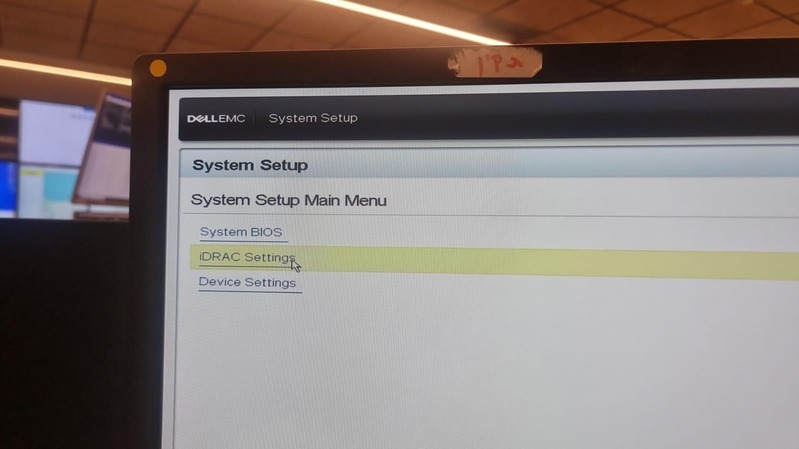
Note that this is the main 'SYSTEM SETUP' menu. From here we will first navigate to Device Settings to access the RAID settings, and only later select the IDRAC settings option. Eventually we will also need to select 'SYSTEM BIOS'.
In the main System Setup menu, do the following in order:
a. RAID Configuration
Navigate to:
System Setup → Device Settings → RAID Controller → Main MenuWe'll now configure RAID — which defines how data is written to the server's disks, how it is organized and divided between the disks, etc.
RAID0 is not recommended and should be deleted if it is set by default. The reason being that it lacks redundancy — in the RAID0 configuration each drive is designated to store an integral part of the OS, and so crucial data lacks a backup.
To delete RAID0 (from the current menu):
Configuration Management → Delete Virtual Disk → ApproveCreate the new (recommended) RAID1 array:
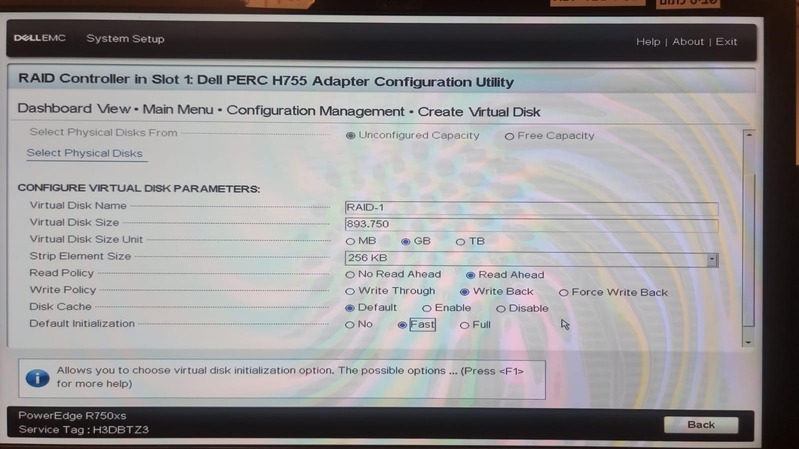
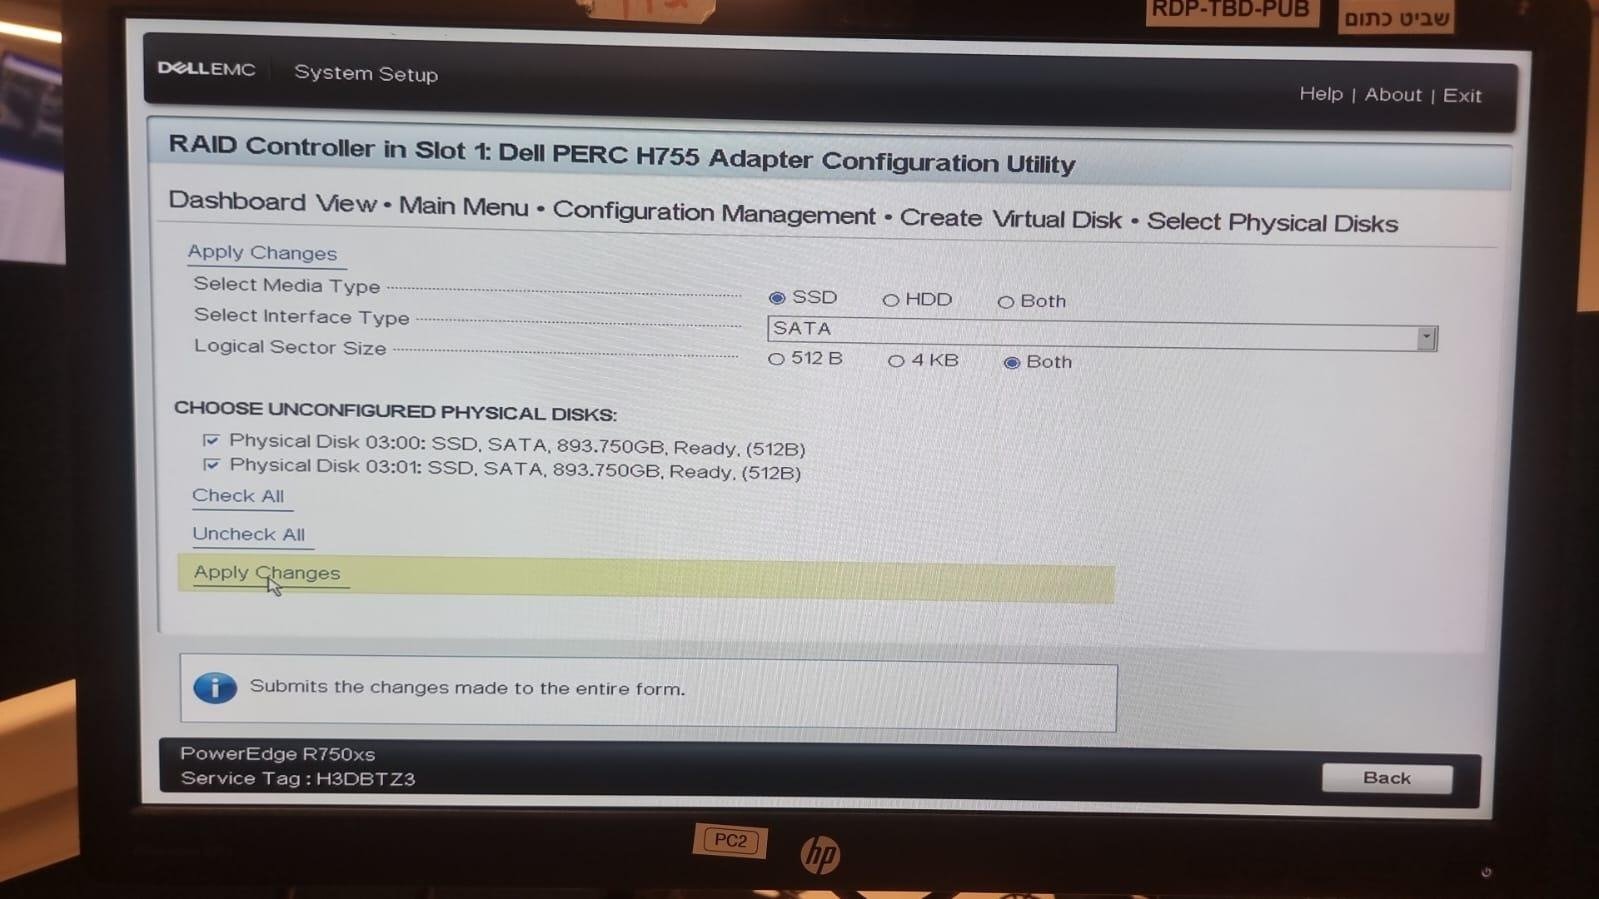
Configuration Management → Create Virtual Disk → Select Virtual DiskConfigure the following settings:
- Media Type: SSD
- Interface Type: SATA
- Logical Sector Size: BOTH
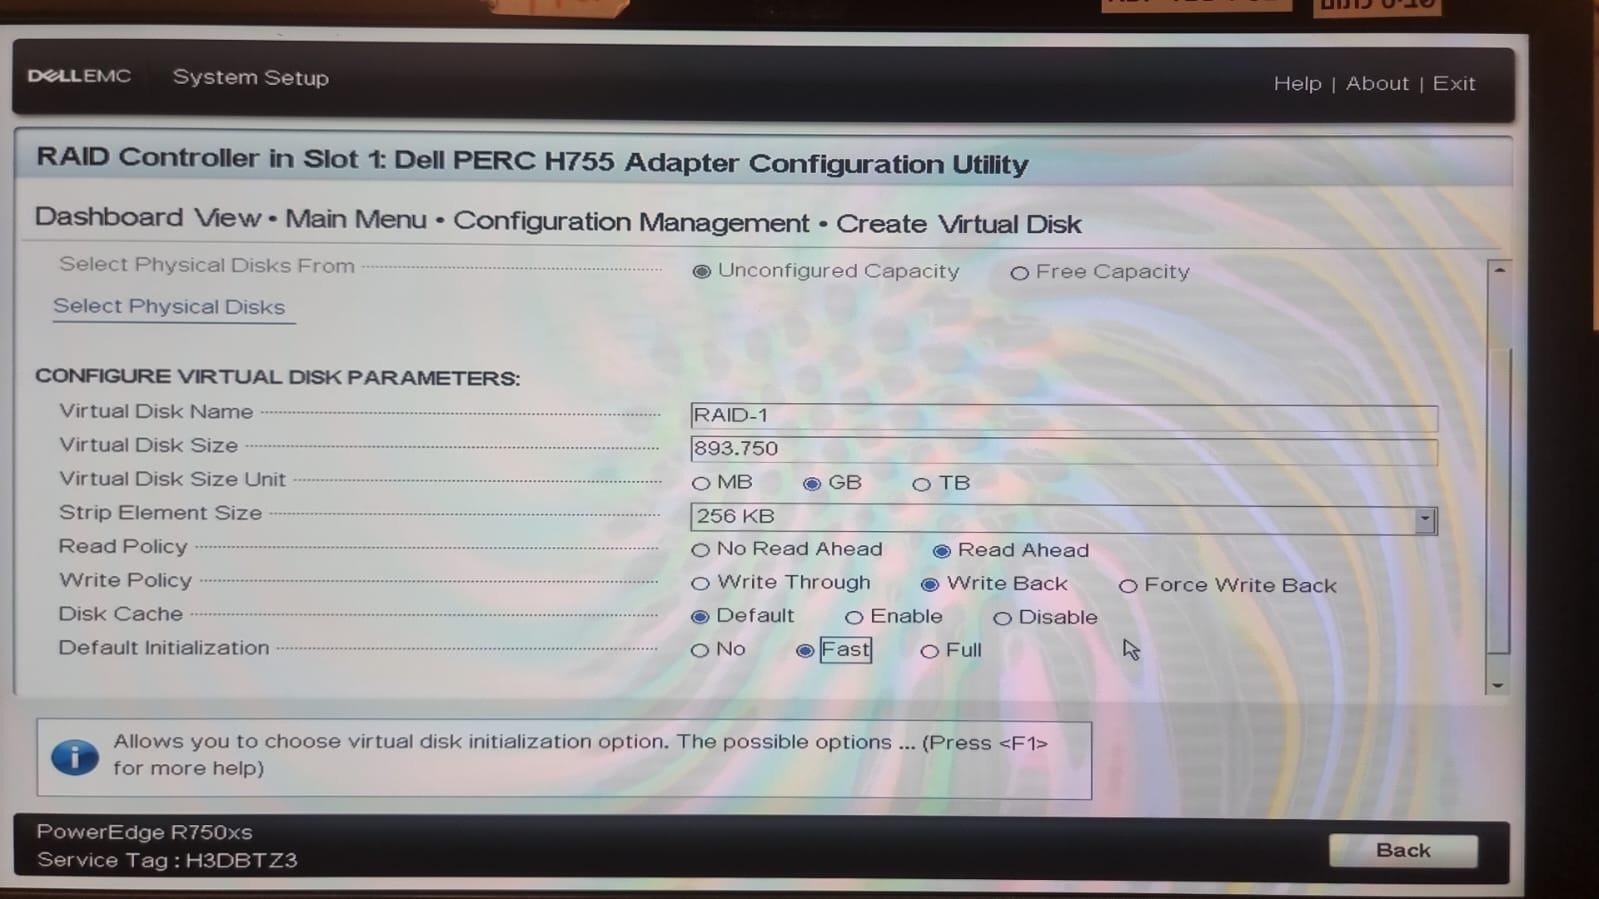
Be sure to select the 893GB disks! Click Apply Changes, go back twice (Back x2), and set:
- Disk name: RAID-1
- Virtual Disk Size: 893.750
- Virtual Disk Size Unit: GB
- Write Policy: Write Back
- Default Initialization: Fast

Then click Create Disk. You should now have:
- One RAID1 disk
- One RAID5 disk
4. BIOS Settings
Return to the main menu, enter System BIOS, and disable all PXE devices (mark all PXE device lines as disabled).

5. iDRAC Configuration
Save and exit (Finish). It is now time to configure the iDRAC's settings. Navigate to the System Setup main menu and select IDRAC settings.
The iDRAC acts like HPE's iLO — a dedicated management controller with its own network configuration, with distinct network settings from the ones that we will configure on the ESXi. It is the host server directly installed on the bare metal hardware. The ESXi OS is installed upon its platform, and upon the ESXi the virtual machines are installed.
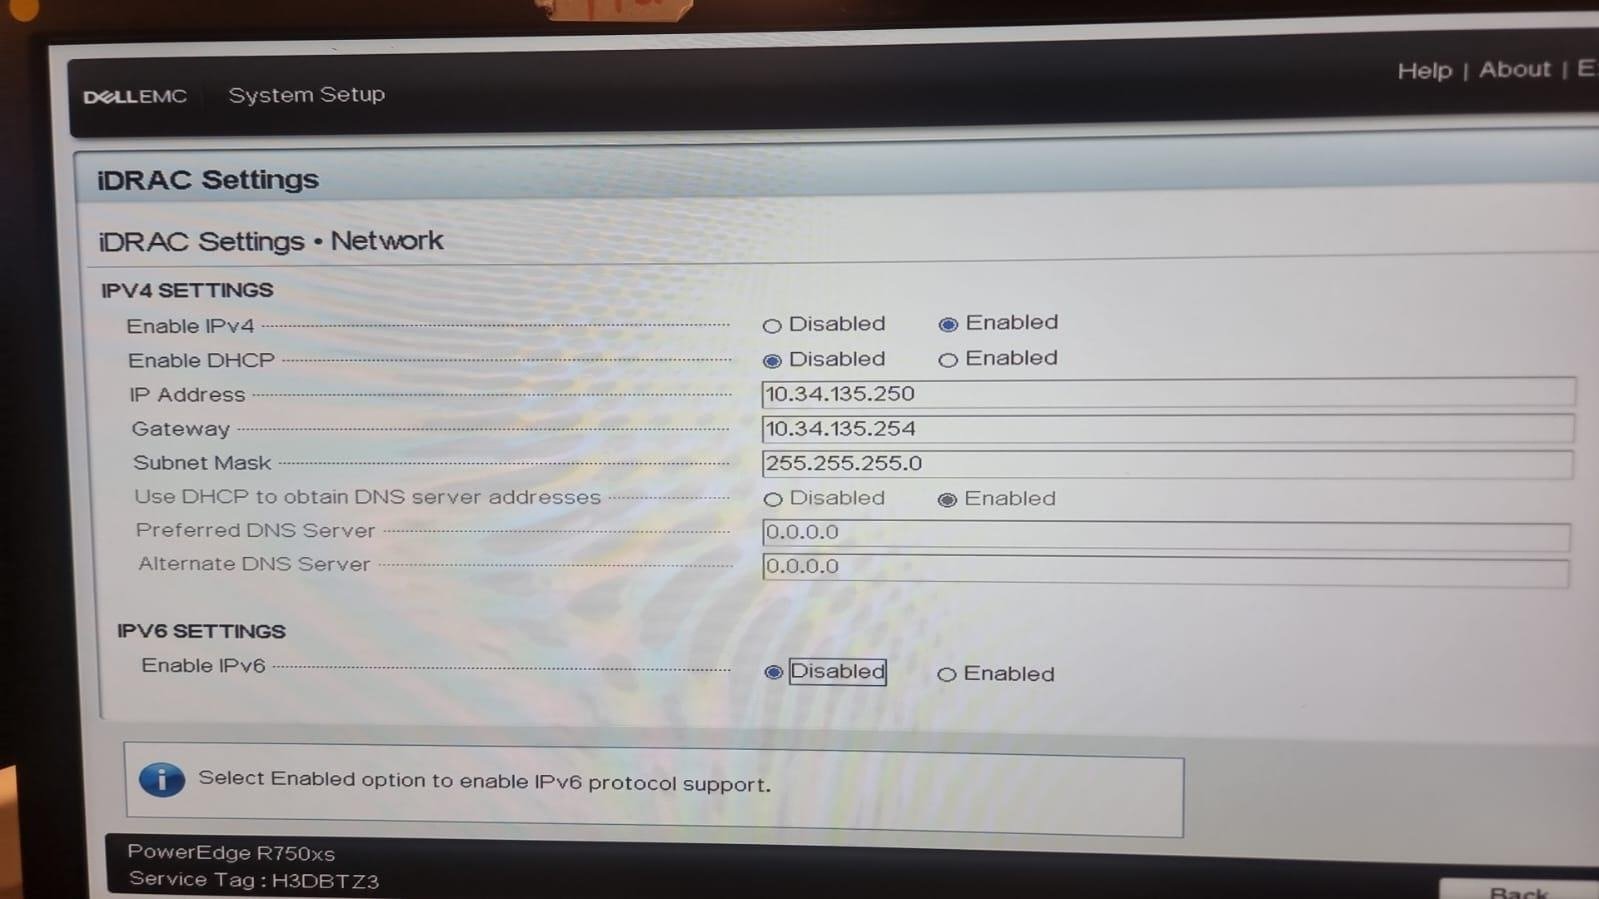
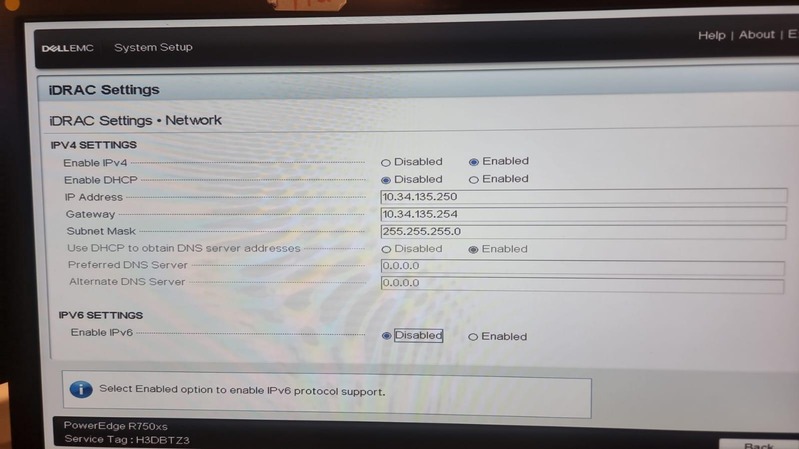
Configure the following:
- Disable DHCP and configure a static IP.
- Set the static IP according to your subnet. The first three octets (if using a /24 subnet) should match the subnet you're assigning the server to. Both the iDRAC and the ESXi need to be on the same subnet.
- Set the Default Gateway for the domain segment.
- Set the Subnet Mask accordingly.
- Disable IPv6 (mark IPv6 settings as disabled if needed).
6. Installing ESXi from the Prepared USB
Reboot the server. During boot, press F11 to enter the BOOT menu. Select to boot from the USB — change the boot order so that the USB takes precedence over everything else.

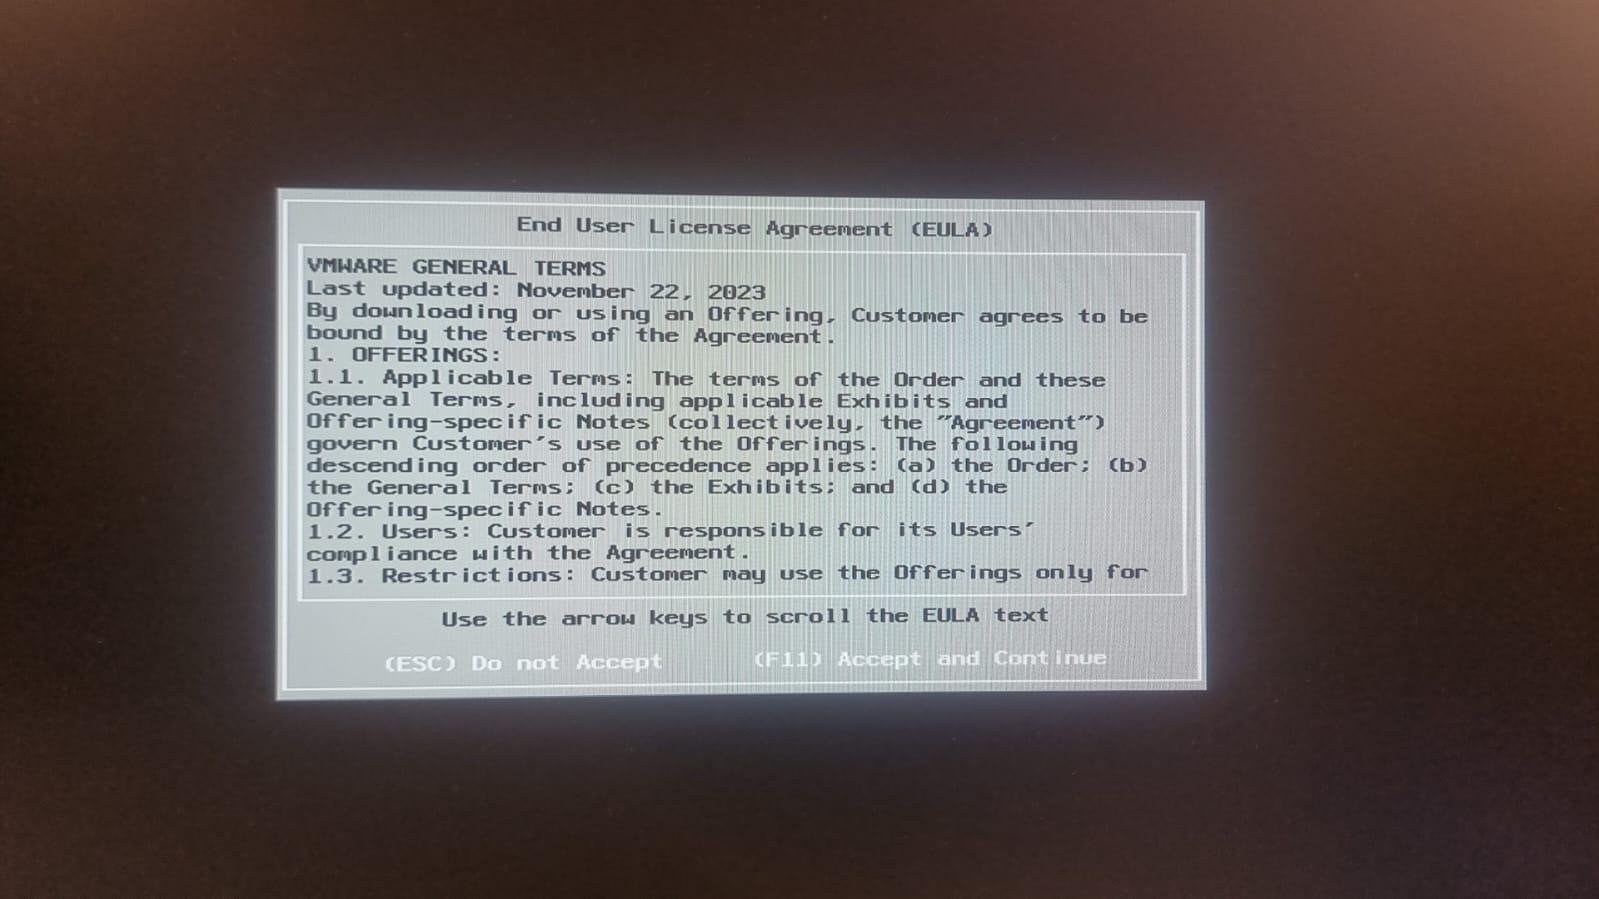
You will see the VMware license agreement. Press F11 to accept and continue.
Proceed with installing ESXi. Once the installation is complete, configure the following network settings:
- IPv4: X.X.X.X (Assign a unique IP in the domain subnet — same subnet as defined for the iDRAC, but with a different last octet.)
- Gateway: X.X.X.X (Domain gateway — same as defined for the iDRAC.)
- Subnet Mask: 255.255.255.0 for a /24 network, etc.
- DNS Primary: (Your domain's DNS server)
- DNS Secondary: (Secondary DNS server)
- DNS Suffix: (Domain DNS suffix)
- IPv6: Disabled (if desired)


The server is now ready. Log in with the username and password previously defined.

 ← Back to Articles